
Tired of losing balls in the rough because your 7-iron won’t hold the green anymore? Grimy golf gear could be the culprit.
Thoroughly cleaning your clubs from grip to head reslosing balls in the roughtores optimum trajectory and spin for lower scores.
Let’s dive into the complete process for revitalizing dirty clubs.
1. Gather Your Supplies

It is important to start the golf club cleaning process by gathering the appropriate supplies. This will make the cleaning process much easier and allow you to properly care for your golf clubs.
You will want to have some mild dish soap on hand. Dish soap is designed to cut through grease and will help lift dirt and grime off your clubs.
Choose a mild soap that will not damage any coatings or materials on the clubs. Stay away from aggressive degreasers or soaps with strong chemicals.
Additionally, you will need access to warm water. The warm water will aid the soap in cutting through grease and loosening debris on the clubs.
Make sure the water is not too hot as this could potentially damage club components.
Soft cloths and towels should also be assembled before you start cleaning. Microfiber cloths work well as they are gentle on club finishes.
Absorbent terry cloth towels can help dry clubs after rinsing. Have plenty available so you can change them out as they become dirty.
An old toothbrush or specially designed groove brush is useful for scrubbing dirt out of the grooves on the clubface. The bristles can dislodge grime that cloths alone cannot remove.
This helps optimize clubface performance.
Finally, grab a can of compressed air. After clubs are cleaned and dried, a quick spray with compressed air can help clear away any lingering dust or debris lodged in tight spaces.
The powerful air jet reaches small crevices.
With all these supplies ready, you can move on to thoroughly cleaning each component of your golf clubs. Taking the time to gather the appropriate gear saves hassle later.
2. Clean the Grips

Golf club grips collect dirt, body oils and sweat over rounds of play. Keeping them clean is important for preventing slippage and maintaining proper swing mechanics.
Start by removing old tape or grips if they are wearing out. Use a sharp utility blade to slice through any old tape wrapped underneath.
Pulling hard will tear and deform old grips so slicing through tape allows easy removal.
With old grips removed, wipe down the exposed grip and shaft with a soapy cloth. Use mild dish soap diluted in warm water.
Wring the cloth out well so it is only damp. Aggressive scrubbing can damage graphite shafts.
After wiping soap over grip and shaft, rinse them thoroughly with clean water. Wipe away all soap residue.
Allow the bare shaft to fully air dry before installing replacement grips. Sit them in a sunny spot or use a fan to speed drying.
Clean your hands thoroughly before handling dried grips and shaft. This prevents new dirt and oils from being transferred back on.
Slide replacement grips into position while hands are freshly cleaned. Apply new grip tape sparingly to hold in place.
3. Clean The Club Heads
It is critically important to regularly clean golf club heads. Dirt, grass, and debris impact the clubface and can greatly reduce performance.
Start by using a soft brush to remove any loose dirt or obvious buildup on the club heads. For irons, use a soft brush to lift debris away from the grooves.
A nylon bristle brush is fine for this initial cleaning step.
Mix a mild soap and water solution for cleaning the club heads. Dish soap diluted in warm water works well.
Dampen a soft microfiber cloth in the solution. Lightly scrub clubfaces, soles and the hosel areas concentrating on visible dirt.
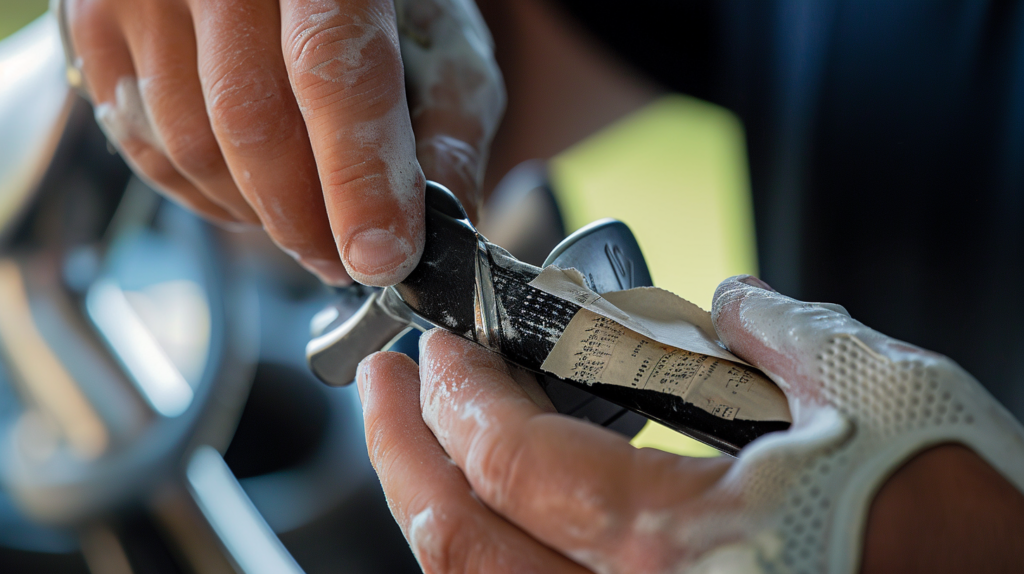
Be extremely meticulous cleaning dirt and skid marks from the face grooves. These thin grooves generate backspin critical for control.
A toothbrush, groove brush or old electric toothbrush scrubbing brush cleans deep inside them best. Carefully scrub each groove then rinse and repeat moving across the clubface.
Pay special attention to any indented engraving on clubheads. Gunk collects inside lettering recesses.
Pour a small amount of soapy water directly over engravings then scrub with a tiny brush before rinsing. This prevents permanent built-up gunk stains.
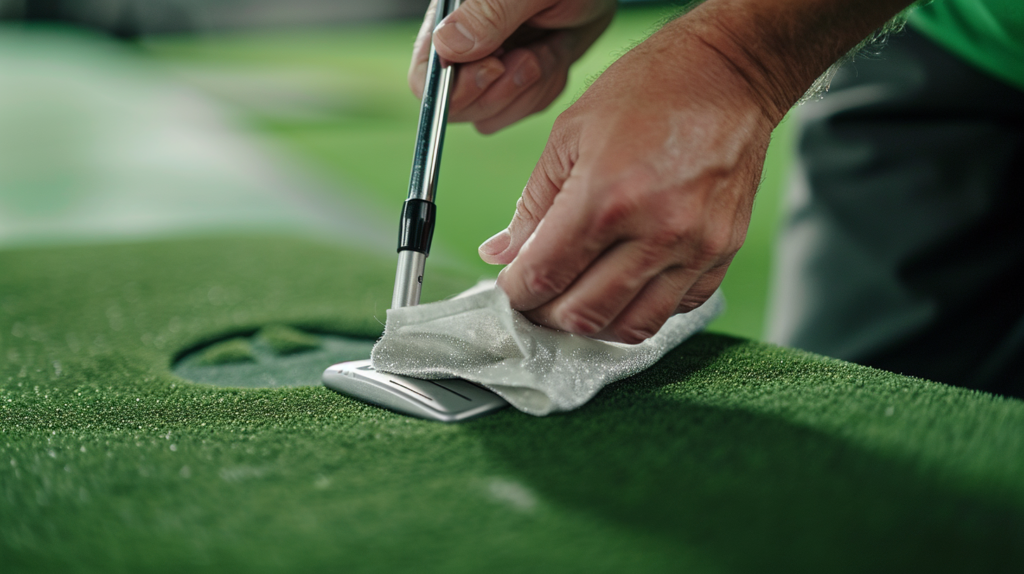
After thorough individual club scrubbing, rinse off all soap residue under running water. Allow water to flow over the face to wash debris out of the grooves.
Shake clubs vigorously while rinsing to dislodge clinging particles.
Once club heads are washed, hand dry them with a fresh microfiber towel. Water spotting and mineral deposits form if moisture is left behind.
Forcing water out of tight grooves requires extra towels.
Place clubs with grooves facing downwards to allow gravitational drainage as they finish air drying. This prevents standing water inside grooves which dilutes clubface traction.
4. Clean The Shafts

Golf club shafts pick up dirt, scuffs and scuffs through athletic swings and typical equipment wear and tear. Clean shafts optimize looks and prevent premature deterioration.
Wipe graphite and lightweight composite shafts down using a lightly soaped microfiber cloth wrapped tightly around them. Twist the cloth as you move up and down the shaft to lightly scrub surface dirt away with minimal pressure.
Excessive scrubbing can damage composite materials by fraying tiny fibers near the surface they are made from.
Use more pressure scrubbing sturdy steel shafts with soap and water. Wrap a groove brush or toothbrush tightly with a towel then forcefully twist it back and forth along steel shafts to scrub out scratches and built up dirt.
Pay careful attention to where shafts insert into clubheads while cleaning. Black marks, dirt and grime accumulate heavily along hosel areas on many shafts.
Generously apply sudsy warm water then scrub with a small brush before wiping clean.
When scrubbing is complete, thoroughly rinse soap off all shafts before drying. Use a towel to absorb standing water then allow complete air drying before playing or storing clubs.
Rotating clubs while drying allowsRED gravitational draining of any internal moisture through holes at shaft tips.
Proper shaft cleaning removes dirt coming from storage bags, oily sunscreen hands or meadow debris after tee shots into deep grass. Keeping shafts clean optimizes swing speed feel.
5. Polish And Protect
After thorough cleaning, polishing golf club heads protects them between deeper cleanings while maintaining looks. Added wax protection further locks in shine while minimizing future dirt build up.
Use a premium metal polish formulated specifically for golf clubs to polish club heads and other visible metal areas on heads, shafts and club attachments. Other metal polishes contain chemicals far too abrasive for use on delicately finished golf clubs made from softer alloys.
Apply a small drop of golf club polish to a completely clean microfiber cloth. Gently rub the polish into the clubhead using small circular motions across the face, sole and sides.
Build up a light polish film then switch to a fresh cloth for gentle buffing until achieving your desired shine.
When achieving preferred gloss levels, clean away all remaining metal polish residue with a dry towel. Leftover polish film subject clubs to yellowing and hazing over time.
Carefully hand buff with a dry cloth until no visible cloudy streaks remain.
Consider applying a thin coat of car wax or specialty golf club wax protector. This seals club faces forming a protective barrier against fingerprints, oils and minor dings during play.
Use wax products specifically formulated for golf gear instead of standard car wax which may contain overly-harsh abrasives.
Properly applied polish and wax keeps clubs shining like new for many extra rounds between cleanings. But proper protection starts with deep scrubbing gear initially before future surface shielding.
Conclusion
Regular golf club cleaning removes dirt, oils, grass and residue slowing down club performance. While it takes some time and effort, proper cleaning protects your equipment investment in the long run.
Always start by gathering the appropriate cleaning supplies together in one place. Mild dish soap, soft cloths and brushes, compressed air and metal polish give you everything needed to thoroughly wash clubs.
Systematically move from grip to clubhead cleaning each club component. Pay special attention to clubface grooves where debris significantly reduces spin and precision.
Finish by polishing clubheads and applying a protective wax barrier coating. This seals them between thorough cleanings. Store cleaned gear properly before the next round to minimize re-soiling.
Consistently cleaning clubs maintains peak playability so you benefit from high precision shots and lower scores for many seasons before equipment replacement becomes necessary.