
Ever wished you could make your golf ball curve from right to left towards your target? Learning how to hit a draw in golf can help you tackled doglegged fairways and access tucked pins that seem out of reach with a straight shot.
Creating a drawing golf ball flight demands some specific grip, stance, swing and impact adjustments to shape trajectory ideally from inside-out.
Let’s break down exactly how to hit draws through a comprehensive guide covering setup, backswing, downswing, strike and finish position. Read on to unlock this signature shot!
How To Hit A Draw in Golf

Four steps to hit a controlled draw shot. First, rotate your left hand clockwise on the grip to see two full knuckles. Keep your right palm facing the target.
This stronger left hand leverage promotes closing the clubface through impact. Second, align your feet, knees, hips and shoulders between 5 to 10 degrees left of your target line.
Third, maintain this open stance as you swing from the inside out, with your clubface closed about 3 to 5 degrees relative to this inside-to-outside path. Fourth and finally, strike the ball before taking a divot to maximize compression.
Unite this specific combination of elements – strong left hand grip, open alignment, inside-out swing plane, closed clubface and ball-then-turf impact – and you will shape majestic, high bombs bending desirably left off the tee or into greens.
Commit these exact positional and technical specifications to muscle memory to repeat curving draw trajectories on command.
1. Have A Proper Grip

A proper grip is essential for shaping shots in golf. To promote a closed clubface through impact to produce a draw, you’ll need to use a stronger left-hand grip.
Turn both hands slightly to the right on the club – this will allow your wrists to flatten out on the downswing and close the clubface. However, be careful not to make your grip too strong, or you may end up hooking the ball.
Take your normal grip first with both hands on the club. Then, rotate your left hand towards your right hand so you can see one to two knuckles on your left hand.
Your right hand should stay in a more neutral position. This stronger left-hand grip will make it easier to manipulate and close the clubface through impact.
When you strengthen your left-hand grip, it’s important both hands work together. So turn your right hand slightly to the right as well – this will keep both hands working in tandem.
Find a grip pressure and tension that keeps the club stable while still allowing you to hinge your wrists up and down. Your grip should not be too tense or too light.
Be careful not to overdo your right-hand grip. Gripping too firmly with your bottom hand or rotating it excessively to the right may prevent you from releasing the club properly.
This could lead to blocks or big pushes instead of draws.
2. Have A Open Stance
Your stance is also vital for proper ball-striking and directing your shot shape. To hit a draw, you’ll need to align your feet, hips, and shoulders slightly left of your target line.
Additionally, you’ll use an open stance to encourage the proper inside-out swing path.
First, pick an intermediate target that is 5-10 yards left of your ultimate destination. Set your body alignment to match that inside target line.
Your feet should be angled out towards the new target, with your front foot flared out left more than your back foot.
Keep your hips aligned with your feet in an open position. Then arrange your shoulders to match that alignment.
Avoid having your lower body aimed left with your shoulders still square – this will make it very difficult to swing from the inside. Rotate your shoulders counterclockwise so your chest points just left of your original target.
In your stance, the majority of your weight should be balanced evenly between both feet or slightly favoring your front side. To hit a draw, you don’t need excess weight on your right side. Instead, stay centered to make an in-to-out swing easier.
3. Do A Backswing

In your backswing, the most important things are maintaining spine angle, keeping normal width in your swing, and allowing your hips to turn away from the target to build torque. The backswing sets your body angles and establishes the foundation to swing in-to-out.
As you start the takeaway, immediately establish your wrist hinge and spine tilt away from the ball. Try to maintain these angles moving back as your shoulders turn away from the target.
Avoid early extending or losing posture until the downswing begins.
Keep your backswing width very similar to a stock shot. If your arms collapse or you swing the club too far inside, it will be very difficult to swing out towards the target on the downswing.
Make a full shoulder turn while keeping normal arm width.
Allow your hips to open up at least 45 degrees on the backswing. This “coiling” builds torque in your body that you’ll use to accelerate into the ball on the downswing.
Set your wrist angles early, then make a full turn against resistance created by your closed lower body.
The clubface itself can be held in a square or slightly closed position throughout the takeaway and backswing. There’s no need to manipulate face angles excessively before you start down.
Focus instead on your grip, posture, arm width, and hip turn.
4. Transition and Downswing

The transition starts the sequence of events that creates an inside-out swing path and closed clubface through impact. Body motion is initiated from the ground up to properly sequence the kinetic chain.
Regain your posture, shift towards the lead side, and clear your hips.
The downswing sequence is powered by the lower body. Your first move should be firing your front hip back towards the target.
From here, rotate your torso through impact while keeping your head still and spine angle constant. Avoid sliding or swaying laterally – rotate instead.
After you shift towards your lead side, aggressively throw your rear hip around through contact. Keep some flex in your lead knee and allow the hips to fully unwind.
You’ll know you’ve made a good body rotation when your belt buckle points at the target post-impact.
As the lower body leads the downswing, the arms and club will naturally drop into a more inside, downward swing plane. Use the momentum from your hip and torso rotation to swing the club from inside the target line into a square or closed impact position.
Maintaining lag in the wrists until late in the downswing will also help square and close the clubface. Keep the angle between your left arm and clubface for as long as possible before rapidly releasing through the hitting zone.
The closing of your wrist angles should match up with your lower body clearing out of the way.
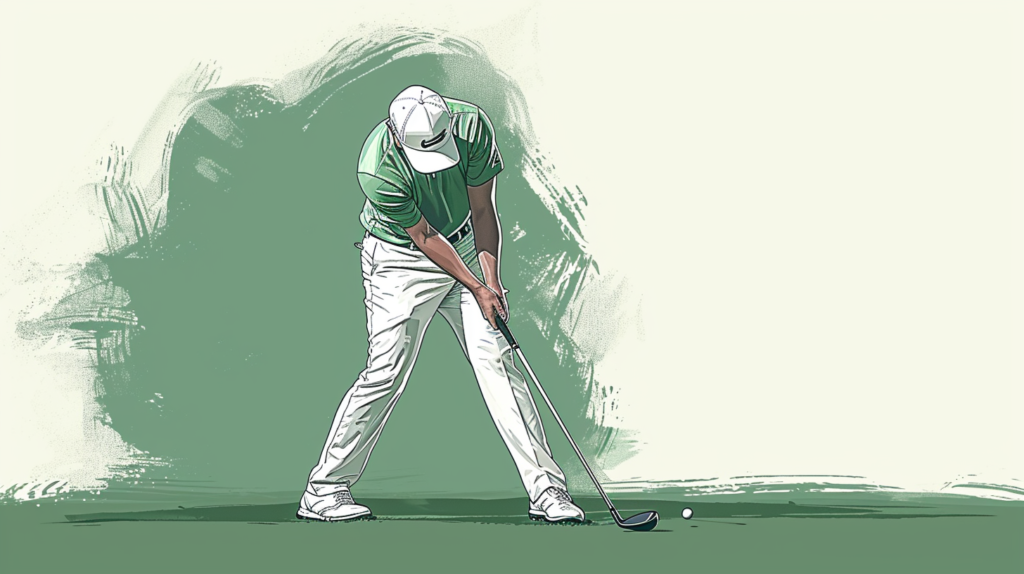
5. Swing For An Impact

To execute the perfect strike for a draw, you’ll need to compress the golf ball before taking a divot. Swing from the inside, with a closed clubface relative to your path.
This will impart right-to-left sidespin on the ball, sending it bounding down the fairway with a curvature towards your target.
At impact, you should strike the ball before making contact with the turf. This compresses the ball first, generating more energy and backspin for greater distance and controlled shape.
Brush the grass lightly after contacting the ball.
The clubface itself should be slightly closed relative to your swing path, which comes from inside-out through the hitting area. A closed face combined with an in-to-out direction are the classic ingredients for a drawing golf shot.
With your body clearing out of the way post-impact, fully release the golf club through the hitting zone for maximum speed. Your wrists should aggressively unwind as you exit left of your target line.
This closing of the face will impart right-to-left sidespin on the ball mid-flight.
6. Follow Through

A balanced finish position with weight on your front foot is ideal after hitting any golf shot, including draws. Rotate fully through the shot, stand tall to admire your shot shape bending towards the target.
Resist the urge to look up prematurely or fall backwards.
As you continue rotating towards the target after impact, allow your arms to fully extend outwards with the club pointing at your intermediate left target. This helps reinforce the inside-to-out swing path for winding draw trajectories.
Your chest and hips should have rotated to face front and center by the finish position. You may even balance slightly towards your target on your lead toe.
Emphasizing the release through impact creates force that carries you towards the left in balance.
Hold your finish for a few seconds while admiring your draw shot bend back towards your original target. When executed perfectly, draws are one of the most satisfying shot shapes in golf! Maintain balance a bit longer before relaxing.
Conclusion
Hitting a controllable draw can truly take your golf game to the next level. With the right mechanics in your grip, stance, swing, impact and follow through, you’ll have the shot-making creativity to attack pins, conquer doglegs, and impress playing partners.
Mastering the draw opens up more strategy and consistency. So commit these fundamentals below to muscle memory.
With some dedicated practice, you’ll watch your draws bending beautifully off the tee and into greens in no time.